Thursday 24 September 2015

Travelling Light

Hello Sharon here with the last Inspiration post for September. I'm just back from a holiday in Normandy France, we had a fantastic time and what a better way of recording those memories than a little journaling.

Heres the Gite that inspired me to sit down and try to and capture the beauty of it. From where I sat I could see a Wisteria cascading down and a Lavender growing in a little gap in the paving.


 The Lavender


My small travelling kit. It consisted of a small Pink Pig plain journalling book which I had previously  covered with chipboard embellishments and painted with Acrylic silks.
My pencil case slimmed down with just my favourite pencils. Journalling pens and stabila pencil and putty rubber. A small tin of Caran Dache Neocolor 11 a few paint brushes. I also included a Artist journaling book for some ideas. Just enough to fit into a small bag, so when there was a few minutes spare after travelling around I could sit and draw a few images and then finish later.


The front of my Travel Journal


Don't forget to pick up any information on places of interest, later I will use some of these to make a Journal page, it also helps you to remember some of the smaller details....


A Dark Room Door stamp I will include later with some info on the Famous Biscuits.


My first page which I sketched and painted at the Gite then added some Stamps And Stencils when I got home.


I have tried to blend the torn out picture from the leaflet in with the background using distress Inks and then some splatters over the whole page..


There are more pages to be done but since coming home at the weekend I haven't had much time, but I hope it inspires you to take a little kit with you where ever you travel.

Happy Crafting Holidays 

Thank you for stopping by from Sharon @ 7 Till 9 Crafting Time


Thursday 17 September 2015

Welcome to today's Guest Designer, Claire !

Hello and welcome ! Today we are welcoming Claire of Claire's Crafty Creations as our Guest Designer, Claire was the winner of the Happy Holidays challenge and therefore was invited to join us for a day ! So let's move on to hear from Claire and see her beautiful project.


My name is Claire and I live in the UK with my 2 dogs and my parrot. I work for a mental health charity and when I'm not at work I can usually be found getting inky in my craft room. Like a lot of crafters I began with cross stitch many years ago and over the years have tried lots of different crafts. Its so exciting to see a blank canvas or piece of card transformed into a little work of art. I enjoy trying new techniques and I have a real love of colour and texture. I don't think I have a particular craftiing style,although I do enjoy creating projects with a vintage look.  I love stamping and stencilling so its a real treat to join the team at Stamps and Stencils as a Guest for this months challenge.


I used an 8x8 canvas but for a change I decided to use it as diamond shape.
I began by blending acrylic paint to create my background splashing with a little water for some texture

I stamped my images (from Chocolate Baroque) onto tissue paper and tore them out before applying them to the canvas with matte gel medium.


Next I coloured the images with Graph'It markers and stencilled some butterflies using a Splodgeaway Stencil and texture paste.

 
 To colour the butterflies, I replaced the stencil and applied versamark ink over the butterflies before adding some colour with PanPastels.
At this point I decided it was looking a wee bit too summery for the brief of Autumn Colours so I set too with some Vintage Photo Distress ink to tone things down.  I watercoloured some shadows around the butterflies, distressed the edges and splashed some watered down ink here and there.
As a finishing touch I stamped the Butterfly Dress image onto acetate and embossed with Gold, Copper and Brass WOW embossing powder, cut the butterflies out and glued them to the image. I folded the acatate wing and just glued the bodies for some extra dimension. The butterflies were finished off with some pearls, again coloured in Autumn shades using Graph'It Markers.
 
 
To edge the canvas I applied a coat of black gesso and once that was dry I rubbed a Versamark inkpad lighly over the edges before applying PanPastels.
 
 I'm sure you'll all agree that Claire's project is gorgeous ! If you would like to join us as Guest Designer all you need to do is join in with the current challenge Up, Up and Away with a twist !

Thursday 10 September 2015

Feather master board

Hi Ruth here with this weeks inspirational post which is a step by step. Masterboards are so useful to have around for backgrounds, inchies and in my case when I need a quick card. I know they are not a new thing but I thought I'd set myself the challenge of making one inspired by the current theme and try and stick to one main image....feathers!


I started by using a brayer to cover a piece of card with autumnal shades of translucent fresco paints. I didn't mind some white showing through.


I then assembled all my feather stamps...I found  5 in different sets. Using archival, sepia, red and rusty shades I started randomly stamping with them. I decided there had to be some contrasting images so I also used a text stamp and some circle themed stencils. I used paint through the stencils.


 I then just kept layering the images trying to cover all the board so that wherever you look you can see detail. I do this in case I want to make inchies.


It's difficult to see but I also used some gold embossing powder on some of the images.


 The finished master board may look very busy but that's the result I wanted. Just to show how it can be used, I made a couple of cards.

 I stamped a feather image on each, one in  brown archival and one white embossing enamel and because the background has feathers it echoes it rather nicely.


The background above uses a stencil and white paint mixed with some silk glaze.


This background is splattered silk glaze.


I also stamped some further images which I will use at a later date. There's still plenty of time to join in the current challenge, hopefully you'll be inspired to enter. 

Tuesday 8 September 2015

Winner and Top 3 - Time Flies

Hello and welcome back ! Today we're sharing the winner and the top 3 of the Time Flies challenge. There were so many beautiful entries and so many different interpretations they were all wonderful, but as usual there can only be one winner.

So congratulations go to:


Congratulations Pamellia! Your card is absolutely beautiful with so many wonderful details !  As the chosen winner Pamellia will be invited to Guest Design for Stamps and Stencils at a future date. Pamellia please email carringtons22@yahoo.co.uk for the details. 
Now on to the Top 3 


Congratulations everyone, please email carringtons22@yahoo.co.uk for your top 3 badge. 
 
All of the winners will also be pinned on the Stamps and Stencils Pinterest Board! 
 
The current challenge is Up, Up and Away with a Twist! and you've still got plenty of time to join in.


Thursday 3 September 2015

Up Up and Away with a twist!

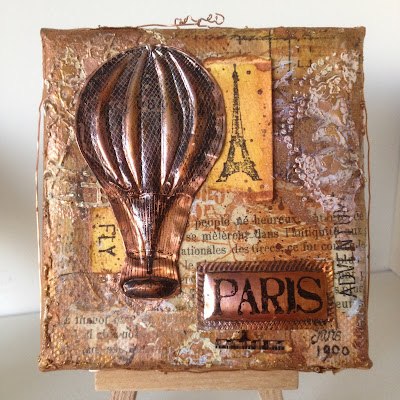
Hi everybody, Sharon here and I am the host for the September challenge here at Stamps and Stencils, the theme this month is -Up, Up and away with a twist ! For this challenge we would like to see something that goes Up Up and away. It could be a plane, bird, a feather... anything that can go up. The twist? you must use autumnal colours. 

So get out the copper, rust and burnt oranges, be it paint, metal or embossing powders and don't forget to include some Stamps or Stencilling. Please remember we are a mixed media inspired challenge blog and your projects should reflect this.

Here's some inspiration from the talented design team to get you started!


Now it's over to you.
We can't wait to see your 'Up, Up and Away' inspired projects.


Sorry, inlinkz will be up and running later!