Thursday, 31 August 2017

Another oldie - shrink plastic!

Hello there! I have a simple post to share with you today - a reminder of another old technique that I always forget to use....I am talking about using shrink plastic! For the uninititated this is a sort of plastic that shrinks on heating - either by use of a heat gun or the oven. Here's what I did....


I started by stamping onto the rough side of the shrink plastic. I used Archival ink but staz on would also work fine. At this point you could add colour - its best to use pencils and only colour lightly as the colour intensifies on shrinking. Because my stamp was relatively small Ididn't colour at all.


Next I did some fussy cutting and then put the stamped images onto a baking tray and put into a preheated oven at 190 degrees C....it took a mximum of 30 seconds. Larger stamps would take longer.


This is how they look when shrunk. Really tiny!!!


I decided to use my shrunked leaves to form part of a card. I used a stencil from clarity and one from that special touch to create the idea of a window and wall. I stamped a chocolate baroque stamp in the window and added the ivy.


I hope you agree that shrink plastic is worth another look!

Big hugs

Rachel xx

Thursday, 24 August 2017

2nd class post....

Hi everyone..Ruth here and I know, I know, it's a terrible play on words, but I couldn't resist. 2nd post of the month, an envelope journal and after all it is Technique School so this is the next class! Well after the wonderful inspirational post by Autumn I didn't want to let the team down.


If you follow the link on my name from the original challenge to my blog, I shared a video of how to make this...and gave a sneaky peek of the front cover by mistake!


I usually share experiments or new products and techniques that I've tried when I do an inspiration post but sometimes teachers need to go back over things to check how much you've learnt and in the process developed.

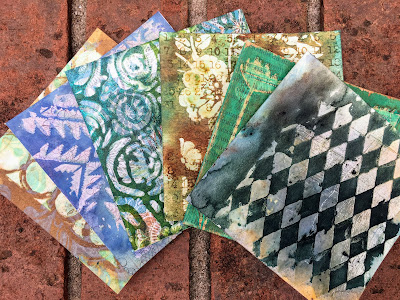
I've revisited my Gelli plate this month as it's been a while and whilst I'm not going to give the basics (as there are lots of videos covering this already), I thought I'd share some of the things I've tried this time around. Inspiration for me came from a Birgit Koopsen video showing how to make backgrounds (thanks to Sue C for giving me the nod in this direction)

For the front cover, I've used lovely Seth Apter stamps again in creating this, brayering paint on a background of Kraft card before adding the stamped image.  Now for the inside pages.


I'm working with the same colour scheme as the last envelope journal, just love these colours together. I also used a drop of drying retarder to extend the drying time of the chalk paint.

They are a mixture of translucent and opaque colours, the only thing you need to remember is that opaque will cover the colour underneath but translucent will let the colour underneath show through...which can look muddy if you use the green (chartreuse) over the purple tones so I tended to start with the green and use the purple tones as accents on top.


I haven't gelli printed on book text so this was a new one for me and I also 'brayered off' on the book text and then stencilled on top.


And now for the results, warning - photo heavy!


Gold always lifts a piece...it's my go to


Alternating printed white card with book text and there's stitching of course.


The light and the dark and there's plenty of room for journalling.

A few detail photos to finish


This time around I felt good results came more easily and could have carried on pulling prints all day...but I stopped short of the whole floor being covered..I'll certainly be printing on book text again and I think some cards may be in the making soon.

The aim of a teacher is to inspire so now it's over to you and can't wait to see your results! I'm also hoping Mrs Clark at least gives me a mark for effort! Ruth x

Thursday, 10 August 2017

Stenciled Transparent Gel Tutorial - Inspirational Post


Boys and girls, please be seated and let's begin today's lesson.  Mrs. Clark of SewPaperPaint joining you with today's lecture.  Technique school is now in session.


The subject of today's discussion is transparent gels.  Transparent gels can be found in a number of forms.  For this lesson, I've used IndigoBlu Ultra Thick Slap-It-On.  There are many many other forms, such as gel medium, clear crackle paste, clear texture paste, and even clear embossing would work for this experiment.


I have chosen a number of substrates to test how each would show through the clear paste.  I applied the Slap-It-On gel with a palette knife through a variety of stencils.  The papers were coated with clear gesso before stenciling.
Substrate no. 1: Book Pages


Substrate no. 2: Small Repeating Pattern 


Substrate no. 3: Distress Ink Background with Stamping in Archival Ink (Darkroom Door Stamp)


Substrate no. 4: Distress Oxide Background


Substrate no. 5: Distress Ink Background with Distress Oxide Stamping (Darkroom Door Stamp)


Substrate no. 6: Busy Patterned Paper (Could substitute gelli printed paper here.)


Next, I experimented with a variety of tints to test their reaction to the gel and substrate.
Overlay no. 1: DecoArt Fluid Acrylic - (Stencil by Darkroom Door)
Observation:  The Blue Green Light acrylic was dried completely and adhered to the gel.  It could not be wiped with a wet cloth.  Sanding was required to regain transparency.  Raw Umber acrylic was applied and burnished while wet with a more satisfying result.


Overlay no. 2: Distress Oxides (Stencil by Balzer Designs)
Observation: The gel partially resisted the Oxides, but some of the cloudiness from the oxide dried on the gel, particularly with the lighter color.


Overlay no. 3: Distress Inks
Observation: The archival ink stamping remained vibrant.  A darker application of inks was required for contrast.  A complete resist formed.


Overlay no. 4: Infusions (Stencil by Tim Holtz)
Observation: The pigment granules rested on the gel beautifully.  The watered pigment dried in a very matte finish, creating a beautiful contrast.


Overlay no. 5: Lindy's Stamp Gang Magicals (Stencil by Tim Holtz)
Observation: The Distress Oxide Stamping muddled beneath the gel, however it remained in tact beneath the Magicals and the oxidation showed through, with a complete color variation.


Overlay no. 6: Lindy's Stamp Gang Sprays (Stencil by Joggles)
Observation: Green matte spray and blue pearlescent spray were used.  The matte finish sprays created a complete resist, but the pearlescent sprays tinted the gel.

Before and After Shots:


Your homework assignment is to participate in our Technique School challenge.  This month we want you to play teacher and share a favorite process or new experiment.  Document your findings with at least one process photo.  We can't wait to see your technique tutorials and new ideas!  Remember to use stamps or stencils or both!

I've created a pinnable image for you convenience.
Class is dismissed!

Tuesday, 8 August 2017

Winners - Colour, Texture, Shape

Hello and welcome back ! Today is the day the winner and top 3 are announced for the Colour, Texture, Shape challenge. We never cease to be amazed by the beautiful projects that we see, but as always there can only be one winner.

Congratulations Nate


Congratulations Nate ! We loved how the inspiration photo is reflected so clearly in your project. Please email carringtons22@yahoo.co.uk to find out about your Guest post. 

Now onto the top 3:


Congratulations everyone ! Please email carringtons22@yahoo.co.uk for your top 3 badge. 

You still have plenty of time to join in with the current challenge Technique School.


Thursday, 3 August 2017

Technique School


Hello artsy gang!  Autumn with you to share our August challenge, Technique School.  This month we want you to play teacher and share a favorite process or new experiment.  Document your findings with at least one process photo.  We can't wait to see your technique tutorials and new ideas!  Remember to use stamps or stencils or both!   I'm thrilled to share our design team tutorials and inspirational projects, so without further ado...

Assembling an envelope journal  

Using fusible film and fibre

Sue

 Using Infusions with fabric.

Cec

Colouring with Crayons


Aging Embossing Powder

Toni

Watercoloured stamping


Now it's over to you !